Showing posts with label Tutorials. Show all posts

Sunday, 6 July 2014

Top 10 successful traders ever

The art of speculation (Jesse Livermore)


This art became even more thriving at Jesse Livermore’s call on the 1929 Crash. Through studies and gambling, this trader started his fame when he predicted both the 1907 and the 1929 stock market crash. From nothing, he succeeded in piling up to $100 million.

Understanding the dynamics (Paul Tudor Jones)

Paul Tudor Jones when predicting the Black Monday of 1987 understood a sequence of events that will lead him to success. If the market started to go down, instead of drying up, the selling would actually cascade. This means that an overvalued market is sure to create more selling. Gambling on this technique makes him win about 100 million.

Break of the Bank Of England (George Soros)

George Soros made fairly $1 billion by shorting the sterling pound. Although considered as being reckless, this gambling was more than rewarding. He managed BOF to withdraw from the European Exchange Rate Mechanism (ERM) in the exact date of September 16, 1992.

Bet on Japanese assets (Templeton Shorts)

This trader invested $100,000 stake in Japan in 1954 to go out with $55 million in 1999. Right after that, Japan was beginning its three-decade long economic miracle. He nearly put about 60 percent of his fund in Japanese assets which was a full success.

Oil trade (Andrew Hall)

The barrel of oil was trading at in $30. Andrew Hall gambled that this price would reach $100 per barrel within five years which actually became true in 2008. Citigroup, his employer made fortune and the trader returned home with $100 million.

Flipping (Paul Rotter)

Dwelling on the basis of the market’s psychology, this technique proved to be successful in handling and mastering markets. Rotter Paul is the initiator of this trade when he executed trades on the Eurex exchange mainly in the Bund, in the Bobl and Schatz interest rate futures.

Shorting real estate market (John Paulson)

Foreseeing the asset bubble in real estate brought several billions of dollars on Wall Street. Famous for accomplishing the greatest trade ever, John Paulson made $15 billion in 2007 whereas he only planned pocketing $3.7 billion.

Prescient short-seller (Jim Chanos)

Jim Chanos got famous at the demise of Enron in October 2001. He profited from selling of commodity, currency and security. Its famous successful shorts include Baldwin-United and lately homebuilders like KB Home (NYSE: KBH).

Gambling on Geopolitical play (Louis Bacon)

In 1990, Bacon anticipated the invasion of Saddam Hussein in Kuwait. Right the following year, he gambled that the U.S would defeat Iraq with the oil market recovering. Betting and anticipating a geopolitical event to make the most in trading field.

Investing in distressed assets (David Tepper)

Tepper’s track record in distressed investing proves otherwise to be a success. He bet the Bank of America and Citigroup wouldn’t be nationalized and he won a lot. He bought severely depressed shares and saw them quadrupled in value in the end of the year 2009.

10 Best Law cases in history

Marbury v. Madison (1803)


This case remains one of the most studied Supreme Court cases in the American history. It labels a border line between the judicial and the executive branches. President John Adams appointed William Marbury as Justice of the Peace at the end of his presidential term. The Secretary of State failed to send the documents. When Thomas Jefferson became president, he asked his Secretary of State, James Madison not to deliver the commission.

McCulloch v. Maryland (1819)

This case proves once again that control remains in the United States’ hands and not in the individual states’. When the Congress created the Second Bank of the US, Maryland wanted stop bank’s operations by taxing it. Further to this case, Congress was granted the power to pass laws on interstate commerce and collect tax under the Necessary and Proper clause of the Constitution.

Roe v. Wade (1973)

Jane Roe sued Henry Wade, the District Attorney of Dallas to the Supreme Court in 1973. She attempts to challenge the constitutionality of the Texas criminal abortion laws. The Court gives women rights to have an abortion if her life is in danger. However, the case also stated the right of states to regulate abortions.

Brown v. Board of Education (1954)

Almost all schools were segregated by race in the 1950s. Oliver Brown of Topeka in Kansas believed it to be in violation of his 14th Amendment right to Equal Protection. In Topeka, Kansas, Oliver Brown and her Linda Brown with other black students were forbidden access to nearby segregated white schools. He brought the case to the Supreme Court that took his side and declared school segregation as unconstitutional.

Gideon v. Wainwright (1961)

After being spotted near a burglary case in 1961, Clarence Earl Gideon was arrested in Florida and was forced to defend himself because he could not afford a lawyer. The judge refused to appoint one to defend him even if he asked for. The 6th Amendment required courts to assign a legal representative to a defendant who cannot afford one.

Miranda v. Arizona (1966)

Miranda rights are well-known among police officers. The Supreme Court decision gave any individual the right against self-incrimination and the right to a lawyer to be appointed if he could not afford one.

Gibbons v. Ogden (1824)

This case sided in favor of Thomas Gibbons who sued Aaron Ogden of monopolizing New York’s waterways as granted to its company by state law. The Supreme Court decided that the federal commerce clause took precedence over the state law.

Dred Scott v. Sandford (1857)

The Court decision for this law case is a landmark in the fight for equality and abolition of slavery. Being a slave purchased in Missouri, Dred Scott’s owners moved to Illinois and Wisconsin, both free states. His owners returned to Missouri and Scott claimed his right to be free. The court ruled that slaves were not citizens and were simple private properties.

Plessy v. Ferguson (1896)

The Separate Car Act compelled all rail companies in Louisiana to provide separate accommodations for white and black passengers. Homer Plessy entered a car for white people and was arrested and jailed. Unfortunately, the Court decided against him.

K. M. Nanavati vs. State of Maharashtra (1959)

Receiving and unprecedented media coverage, this law case remains one of the most historical dealing with bench trial and jury trial. The naval commander, Kawas Manekshaw Nanavati was accused of the murder his wife’s lover, Prem Ahuja. He was declared guilty by jury but Bombay High Court recalled the case as a bench trial.

Thursday, 3 July 2014

Go out and Comment on Another Blog or Two or Three

Here they are, the final list of post in this series, 28 Days to Build a Successful Blog. I hope you found the series useful as much as I enjoyed putting it together.

If you have suggestions of additional post you would like me to do. Or if you have your own suggestions we can add, please leave your comments here. Lets keep building on the 28 days to build a successful blog.


5 ways to improve your SEO strategy

5 ways to improve your SEO strategy


The purpose of an SEO strategy is to help you form an action plan for achieving both your short and long term online goals. If you already have a strategy or if this is something you will create now, the 5 ways outlined below will help you improve it and make it more efficient.

What is a Search Engine Optimization strategy?

In general, when you set goals (business goals, personal goals etc.) you also need to have a plan that describes step-by-step how to achieve your goals. This action plan is your strategy for meeting your targets. Likewise when we talk about the Internet and SEO you need to have specific measurable goals on what you want to achieve online and a search engine optimization strategy will tell you how to get there.

Why it’s important to have an SEO Strategy?

Without an SEO strategy you won’t know if what you are doing is in the right direction. For example you don’t just run Facebook ads for the sake of running ads but this should be part of your overall strategy. Every action you do should be in accordance with your targets otherwise you are just wasting your time and money.

An SEO strategy is necessary for every online property. If you are running a small business online or if you are a solo blogger you need to have in mind a strategy that will help you meet your targets. It doesn’t have to be complicated or too detail but what is more important is to have one.

What are some typical items in an SEO strategy?

A good SEO strategy is tailored to the needs of the particular web property but in general these are some typical items that are part of every strategy (don’t forget that a good SEO strategy is not only about SEO):

Content marketing – Everything starts with good content and your task is not only to publish content but create content that users want to read and share

On-Page SEO – This is now more important than ever and one of the first milestones in your strategic planning. Before doing anything else you have to get on page SEO right and then move to the next items.

Off Page SEO – Link building is not the same as it used to be, but it is still an important ranking factor so you have to learn what you can do and what not to do for getting results

Social media marketing – When you reach to the point that you have great content and a fantastic website, the next obvious step is to utilize the power of social media and distribute your content in the various social media networks.


How to improve your SEO strategy?
Your SEO strategy is not something static, in other words you don’t just ‘set it and forget it’ but it’s a dynamic process that needs fine tuning and control depending on the results produced.

Over the years I have worked with many clients establishing their SEO and Internet marketing strategies and found that some areas need more attention than others. It is also surprising that as we get deeper into SEO we tend to forget the basic rules that’s why it is always suggested to go back and review your strategic plan on a regular basis.


1. Go back to the basics

You should do exactly what the name suggests i.e. go back to the basic SEO rules and work on your titles, descriptions, URL structure and all those items that we consider not important but play a huge role in the end.

From my experience the best way is to use an SEO Audit Checklist that will guide you through the process and produce a clear action plan in the end.

2. Check for manual or algorithmic penalties

One of the possible reasons that your SEO strategy may fail is that external factors cannot let it succeed. To be more specific, if during the lifetime of your domain you have violated any of the Google webmaster guidelines that led to a manual or algorithmic penalty then following your SEO strategy is not enough.

You should first make sure that corrective actions are taken to remove any penalties from your domain and then continue with your long term plan.

For example, if you have being doing link building by purchasing link packages or exchanging links with other webmasters then most probably you were hit by Panda or Penguin and your rankings have dropped. In such cases you should first remove any unnatural links by either asking the other webmasters to remove them or by using the Google disavow tool and then start with SEO again.

3. Start thinking beyond SEO

As already mentioned above, when creating an SEO strategy you should think beyond SEO. The term ‘SEO Strategy’ may be misleading since what we actually mean is setting up an overall Internet marketing strategy or even better a digital marketing strategy.

Try to think of other sources of traffic besides Search engines and other ways to enhance the user experience besides the browser. To give you a real example, part of my SEO strategy in growing caloriesecrets to 250,000 visits per month, was the development of mobile apps (for Windows, Amazon and Android) so as to give my readers another medium to access my content. This action did not only increase my traffic but it also gave me a great opportunity to position my brand in the mobile market as well.

When you think out of the box and invest on alternative sources of traffic you also gain in terms of SEO since the extra visibility and exposure works like a natural link building magnet.

4. Take a look on your competitors

When you operate in a competitive niche success or failure depends on what your competitors are doing as well. For example let’s say you have a Jewelry shop without an online presence but the shop opposite the street (a jewelry shop as well) has a website and is getting more customers than you because they can find them through the Internet. In this case your competitors are a step ahead and winning over your back.

What I am trying to say is that besides concentrating on building the best possible presence for your company, you should also take a look at what your competitors are doing and make sure that you don’t let them take the lead. If they have an app in the Apple Store then you should make one, if they have thousands of Facebook followers then you should have too, if they hire an SEO to get better results then you should hire an SEO too.

That’s also another reason why you need to have an SEO strategy in the first place. Your strategy needs to take all these factors into account and formulate the best possible path to out pass your competitors.

5. Try to increase engagement with your content

Last but not least, user engagement. Search engines and social media networks are looking for websites that users like to engage with. These websites are more likely to appear higher in the search engine results pages and when searching though the various social networks.

When we talk about engagement we mean comments, Facebook likes, +1s, Tweets, social media shares and anything else that indicates that the content of a website is interesting and sharable.

Assuming that your content is good, some ways to increase engagement are:

Ask users to comment on your posts
Always reply to user comments and encourage them to do so
Promote your posts after your publish them
Run a ‘Q and A’ session on social media so that users can ask you questions and you can provide them with an answer in the form of a new post on your website
Offer incentives to encourage user comments – Users who enter a valid comment can enter a draw to win a price
Make sure that social media sharing buttons are visible while users are viewing your pages and posts
Advertise – You can use Facebook ads, Twitter promoted tweets or Google Adwords to get your content in front of more users. This may be really useful in the beginning until you get your own tribe of loyal visitors.
Conclusion

Having an SEO strategy is like using a GPS to take you from point A to point B. In this case point A is your starting point and point B is what you want to achieve online. Each SEO strategy is different and depends on the type of business (website), what the competition is doing, the complexity of the niche and availability of budget and resources.

Some common items to find in any strategy are: content marketing, SEO (both on-page and off-page) and social media marketing.

From my experience some items that can improve your overall SEO strategy and give you better results are:

Ensuring that you’ve got the basics covered
No external factors are holding you back
Your strategy covers other areas and not just pure SEO
You know what your competitors are doing
You always try to improve the user experience
Finally, for any project or strategic plan to be successful it needs to have proper monitoring and control. Part of your responsibilities is to review your strategy on a regular basis, analyze the results, identify the failure and successes and take correction actions until you reach your final targets.

5 ways to improve your SEO strategy by Alex Chris

Wednesday, 2 July 2014

How do I create a Blogger Feed?

Enter your blog's web address in the "Ready to Burn?" form found on FeedBurner's homepage and at the bottom of the pages in the Blog and Podcast sections. If you plan to publish a podcast with your Blogger feed, check the "I am a podcaster" box. Click Next ».
The Identify Feed Source page should appear.

On "Welcome", make sure the title and FeedBurner address (URL) of your new feed are values you prefer


The Create or Sign In To Your FeedBurner Account page should appear.
Also on this page, create a FeedBurner account by picking a username and password and supplying your email address.
When you've supplied all the required information on this page, click Activate Feed ». A "Congrats" page should appear.
Read all of the information on "Congrats", then click Next » to continue with the setup process.
If you selected "I am a podcaster" on the homepage, configuration options for our SmartCast service will appear. Here you can supply categories and other information for iTunes, append a copyright message, and submit your podcast to Yahoo! Search.

When you are finished, click Next ». Configuration options for FeedBurner stats services should appear.
On the stats configuration page, select the level of feed stats detail you want.


Click Next » to finish the setup process and enter our feed management interface.
You're now ready to make your FeedBurner feed available on your Blogger site!
Tracking 100% of your feed traffic: Redirecting your Blogger feed to your FeedBurner feed
Blogger can make sure all feed traffic for your blog content goes to your FeedBurner feed. This ensures your FeedBurner stats are comprehensive and accurate; even subscribers to the 'Original Feed' are routed through FeedBurner. To redirect your feed:
In a new browser window, sign in to your Blogger account.
From the Blogger Dashboard, click the Settings link for the blog you want to promote.
The Settings page for your selected blog should appear.
Click the Site Feed link under the Settings tab.
Type your complete FeedBurner feed address into the Post Feed Redirect URL text field. Make sure you type in your entire feed address including the "http://" portion.
Click Save Settings.
You should see the message "Settings were Saved Successfully".
Blogger will now redirect all feed traffic for your blog to your FeedBurner feed.
Note: If you are using the redirection feature within Blogger to send all of your feed traffic to your FeedBurner feed, you may want to modify the code we provide in order to keep your subscribers with you, even if you leave FeedBurner.

Instagram for PC

Instagrille is a free Instagram app that provides the best Instagram experience on the PC. In addition to all your favorite Instagram features including feeds, profile views, comments and ‘likes’, with Instagrille you can now search, share and download photos from Instagram directly on your computer.

Step 1 – Download and Install the Android Emulator for the Temple Run for PC Free Download.

BlueStack application you can get it by click on direct download link Download Blue Stack.
Download the software
Follow the onscreen instructions to install the android mobile phone emulator.
Click finish and restart if you are required to do so.
Step 2 – Download Instagram for PC (APK)
Click to Download Instagram for PC

Install Instagram for PC Free
Is guide only uses free downloads and does not contain hacks or cracked software. We guarantee instagram for PC Free.
Navigate to where you have download the APK file.
For Windows users it’s usually C:\users\your-name\downloads
Now just double-click on the icon.
Instagram is now installing onto your windows computer.

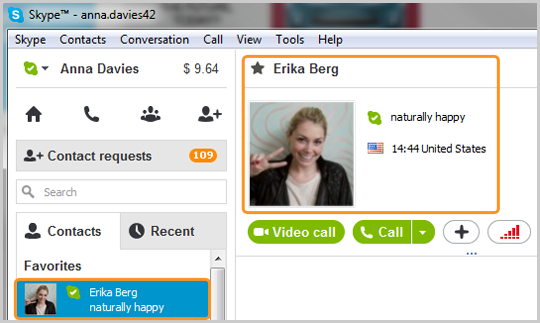
How to use Record Skype Skype Video Call on PC

Fast Download the video call setup

Step 2. Launch Free Video Call Recorder for Skype


Follow Start > All Programs > DVDVideoSoft > Programs > Free Video Call Recorder for Skype or just click the DVDVideoSoft Free Studio icon on the desktop.
The interface is rather simple and self explaining. There are buttons to start/pause/stop the recording and the list of recording modes to choose from.
Step 3. Select Mode


Choose one of the available modes from the drop-down list: record all sides, record other side only, record audio only.
Step 4. Select Output Folder


Click the “Browse...” button to select the output folder.
Step 5. Record Call


Start a Skype call. After that click the Start button.
Step 6. Stop Recording

To stop the recording, use the buttons Pause/Stop.
Step 7. Find Output Files


Open the output folder by clicking the “Show in folder” button.

How to Factory Reset Your Android Phone or Tablet When It Won’t Boot


Safe mode can help you troubleshoot your Android, but sometimes you’ll need to wipe everything and restore your device to its factory state. You can even perform a factory reset when your Android phone or tablet won’t boot normally.
Ensure you have any important data backed up before doing a reset. This includes your Google Authenticator credentials, which will be lost during the reset. Disable two-factor authentication on your accounts first or you’ll experience some trouble afterwards.
If You Can’t Boot
If safe mode doesn’t help fix your device, you can perform a hard reset by booting into a special recovery mode. First, ensure your device is fully shut down.
Press and hold the correct keys to boot the device into recovery mode. This will vary from device to device. Here are some examples:
Nexus 7: Volume Up + Volume Down + Power
Samsung Galaxy S3: Volume Up + Home + Power
Motorola Droid X: Home + Power
Devices With Camera Buttons: Volume Up + Camera
Similar devices will likely use similar key combinations. For example, the Nexus 4 also uses Volume Up + Volume Down + Power.
If your device isn’t on this list and none of the above methods work, do a Google search for the name of your device and “recovery mode” – or look in the device’s manual or support pages.

Release the buttons when the device powered on. You’ll see an image of an Android lying on its back with its chest open and its internals revealed.


Press the Volume Up and Volume Down keys to scroll through the options until you see Recovery mode on the screen.


Press the Power button to restart into recovery mode. You’ll soon see an Android with a red triangle.
Hold down the Power button and tap Volume Up. You’ll see the Android system recovery menu appear at the top of your screen.

Select wipe data / factory reset with the volume keys and tap the Power button to activate it.
Select Yes – erase all user data with the volume buttons and tap Power. Your device will be reset to its factory state and all your data will be erased.

Tap the Factory data reset option and to through the reset of the steps to confirm the factory reset.
If the factory reset process doesn’t fix your problems – or doesn’t work at all – it’s likely that there’s a problem with your device’s hardware. If it’s still under warranty, you should have it fixed or replaced.
(There’s one exception to this: If you’ve been flashing custom ROMs and messing with your device’s low-level software, it’s possible that you could have overwritten the stock recovery software. In this case, it’s possible that you have a software problem and not a hardware problem.)

Add AdSense right After Tag

Add AdSense right After <!--More--> Tag

This is a great tutorial which will multiply your current click through rate and add a new boom to your over all Adsense earning. With a big repository of plugins for Wordpress blogs like Quick Adsense, WP users never need to worry while adding Adsense to any part of the blog they wish but in blogger we lack plugins that could do the job automatically. Therefore this week my main focus lies in developing more of such plugins that could provide you great front end experience. Thanks our developer Ahmed Nasir the script developed this time will automatically insert your AdSense Ad right after the opening paragraph (Post summary) or the read more button(Jump Break). The read more link is distinguished by the HTML tag "<!--more-->" , we will use a simple Jquery code to tell the browser to append an Ad zone with a unique div ID, right before the more tag. In  browsers where JavaScript is disabled the Ad zone will instead display at the end of post. You can see the demo on our blog, right after reading this line...


Installing the Script on Blogger
Go to Blogger > Templates
Backup your template
Tick the "Expand Widget Templates" box
Search for <head>
Just below it paste the following JQuery code only if you are not yet using jQuery script on your blog

<script src='http://ajax.googleapis.com/ajax/libs/jquery/1/jquery.min.js' type='text/javascript'/>
     6.   Next paste the following code below <head>
<script type='text/javascript'>
$(document).ready(function(){

$(&#39;a[name=&quot;more&quot;]&#39;).before($(&#39;#MBT-google-ad&#39;).html());
$(&#39;#MBT-google-ad&#39;).html(&#39;&#39;);

});
</script>

Optional: If you want to display the ad at two places i.e. below read more tag and also at the end of post then delete the highlighted yellow code. Also delete the yellow highlighted code from step#8 given  below
    7.  Now search the following code:
<data:post.body/>
      8.  Just below it paste the following code:
<b:if cond='data:blog.pageType == &quot;item&quot;'>
<div style="display:none;">
<div id='MBT-google-ad'>
<br/>
<center>
ADD ENCODED ADSENSE CODE HERE </center>
<br/>
</div>
</div>  </b:if>
Replace the bolded text above with your Adsense code. Remember that the code that you copy from your Google Adsense Account must be first encoded inorder to work with blogger templates. Simply copy the code and then encode it using the following MBT tool.
Encode your AdSense code using: Any Encoder
Copy the encoded code from MBT HTML encoder and then paste it on the bolded text that says: ADD ENCODED ADSENSE CODE HERE
      9. Save your template and you are all done!

Visit your blog and then visit any post page, you will see an Ad hanging just perfectly right after the first opening Summary paragraph. :)

Saturday, 28 June 2014

How to Post Thumbnail Files on Blogger

How to Post Thumbnail Files on Blogger


Related Articles
How to Make Blog Post Thumbnails Clickable in Blogger
How to Open an Online Clothing Boutique
How Large of an SD Card Can the Samsung Galaxy S3 Handle?
The Importance of Marketing for the Success of a Business
Management Theories & Concepts at the Workplace
Signs & Symptoms of a Hacked Smartphone

Business owners who use Google's Blogger platform for their official blogs often seek ways to provide site visitors -- possibly customers or staff -- with links to images and blog posts in a visually appealing manner. Thumbnails, which are small images, can be used as links. You add thumbnails to your Blogger blog using widgets, which Google refers to as gadgets. You can set up photo website-specific gadgets or a gadget that displays thumbnails of images used in recent posts from your Blogger blog or another blog.

Step 1 Access your Blogger dashboard and click the “More Options” drop-down menu next to the Go to Post List button for one of your blogs. Select “Layout” to go to the blog’s Layout screen. You can also click the name of your blog to go to the Overview screen and click “Layout” on the left sidebar.

Step 2 Click “Add a Gadget” in the section where you want to post thumbnail files to your blog.
Related Reading: How to Put a Button on a Post in Blogger

Step 3 Type the word “thumbnails” in the Search for Gadgets field near the upper-right corner of the window and click the magnifying glass icon.
Step 4 Select a gadget option on the list or click the “+” next to it to open the Configure Gadget screen. You can post thumbnails of pictures saved to a Picasa album or Flickr photostream or thumbnails of recent blog posts.

Step 5 Complete the fields on the Configure Gadget screen. For example, for Picasa or Flickr, add a title, add a thumbnail height in pixels, provide a username, select the number of thumbnails to display and provide a site link.
For recent blog posts, add a title and thumbnail height, choose a blog from which to post, select the number of posts to display and post title maximum length, configure the snippet and meta settings, and edit the font and link options.
Step 6 Click the “Save” button when finished. Click “Save Arrangement” on the Layout screen to update your blog.

Tips
Type “thumbnails” instead of “thumbnail” in the search field, or the thumbnail gadgets won’t appear. You can also use the words “Picasa,” “Flickr” or “Recent Posts” to find the gadgets.
If you don’t see the Search for Gadgets field, click each category name on the left side of the window to see if the field appears under any other category. If you can’t find it, scroll through each category to find thumbnail gadgets.

How To Embed PDF, DOC, XLS And PPT Files In Blogger


A blogger often finds the need to attach a Microsoft Office document file or PDF to a blog post. Embedding is the perfect solution to this but Blogger, being a free platform doesn’t provide its user with a lot of direct options here as opposed to the several other platforms that come with a price tag. Blogger wouldn't let you directly embed a PDF, DOC, XLS or PPT file and so we'll be looking at an indirect way that can get the job done really nicely and yes, it'd still technically be called embedding. A simple blogging trick would even let you embed music players to your blogger blog.

PDF, DOC, XLS and PPT are among the most used containers of information and hence are used almost everywhere a computer table is found. Such a file might also sometime be needed to embed in a blog post. Instead of writing the whole extensive document as text in your post, you could embed that document file on your blog which will not only make it look neat but will also be easy for the reader to read. So let's take a look at how to embed these files to your Blogger blog.

In order to embed almost anything to Blogger, the HTML iframe tag is your best friend. If it is a file you want to embed from some other website or online source, all you have to do is add the html code in the right place. iframe basically allows you to display a web page within a web page, using this property of its' you can easily embed a Microsoft Office/PDF file in your blog post. Here is how you can do that:
Go to the HTML section of your post.
Locate the point in your post where you want your file to be embedded.
Add the following iframe code

<iframe src="yourURLhere" width="570" height="400" ></iframe>

Replace yourURLhere with the web address of the file you want to embed in your post. You can set the height and width of the frame as required.

What if your file isn't available online?

You can make it available online by using Google Drive by uploading that required file from your computer to Google Drive and then use the above mentioned method to embed it to your post. Here's what you'll need to do:
Go to drive.google.com and Sign-in with your Google account
Upload your file to Google drive
Set the permissions
The permissions here refer to the file access which is by-default private on Google Drive i.e. only the uploader has the access to a file. You'll be needing to change that for sure.
Right click on the uploaded file and select Share

A dialogue box will appear with the file URL and a list of users who have access to the file. Click on Change in the Who has access panel

Select ‘Anyone with the link’ from the dialogue box and hit Save


Now use that URL of the file and embed it to your blogger post anywhere you desire. Below is a DOC embedded onto the blog post directly from Google Drive.


So how did it go? We're sure you were easily able to embed the several types of files to your Blogger blog using the steps mentioned. However, if you've got any question or confusion in mind, drop it below in the comments section.

3 best blogging platforms

3 best blogging platforms
Blogging is one of the most discussed topics online. It is very popular now a days and due to its huge earning potential everyone wants to become a blogger. but for setting up a new blog we need a good blogging platform. In this article we will discuss about 3 best blogging platforms. There are hundreds of blogging platforms available on the internet but these three are best suitable blogging platforms for any type of blog. By using one of these blogging platform you can create your new blog for both personal or professional use according to your requirements.


Self hosted Wordpress is the best blogging platform among all the available blogging platforms on the internet. It provides great flexibility and features to a blogger. It is highly SEO optimized blogging platform which helps in high search engine rankings as compare to other blogging platforms. It has millions of plugins and themes available on internet. By using these themes and plugins you can make your blog more powerful and attractive. Wordpress can be also used for creating websites for any online business or ecommerce purpose.

Features of Wordpress
Free – Wordpress is freely available on the internet. There is no need to pay anything whether you want to use it for personal or any business purpose.
Open source – Wordpress is an open source blogging platform means just download the package of the wordpress and customize it according to your own requirements.
Good support – There is a large community of wordpress developers available on the internet. You can get professional help from these wordpress developers in the community in any problem situation. For example in fixing database errors, editing themes, creating child themes, creating plugins or removing malwares from your blog etc.
Plugins – Plugins can be used to increase functionality of your blog such as adding ecommerce features to your blog. There are thousands of free and premium wordpress plugins available on the internet. These plugins are capable of turning your simple wordpress blog into a giant professional content management system. Some popular categories of the wordpress plugins are social media, ecommerce, SEO, payment processors, forms etc.

Themes -  Themes can be used to improve the user interface of your wordpress blog. These can be used for adding very advanced and professional quality design to your blog. There are thousands of free and premium themes are available on the internet. Moreover you can also customized these themes according to your own needs. Their inbulit theme editor provides various features such color scheme editor, font editor, advertisement manager etc.

SEO optimized – Wordpress is SEO optimized blogging platform. There are various plugins are available which can be used for SEO optimization of wordpress blogs easily. These plugins helps in increasing search engine rankings of your blog. You can also perform keyword research while writing a post in wordpress post editor by using plugins.


Blogger by Google is another best free blogging platform. You can create your new blog in few minutes by using blogger. It is very easy to create and manage new blogs using blogger. It provides very simple and powerful dashboard from which you can control all your blogs and other activities such monitor stats, create posts, manage comments.

Features of blogger
Simple & easy to use – This is the best feature of blogger. It has very simple and neat interface, anyone with negligible experience can start blogger blog in very small time. It is very easy to manage the blogger blogs. User can manage all his/her blogs from a single dashboard. This dashboard contains all the options such post editor, comment management , traffic monitoring, general settings etc.

Secure – In terms of security blogger is the best blogging platform. Blogger blog’s face very less number of security attacks as compare to wordpress blogs.

Widgets – Widgets are like plugins in wordpress. These widgets can be used for increasing functionality of any blogger blog. There are thousands of free widgets available on the internet for blogger blogs.

Templates – Templates are the themes of blogger blogs. Blogger is again best in this field because there are various free and paid templates available on the internet.
Magbook a magazine style blogger template

Good Support – Internet is full of free blogger guides so there is no need to worry about anything when you are using blogger as your blogging platform. You can take help from internet regarding any topic related to blogger.

Tumblr is a micro blogging platform where you can create short length posts. It is best blogging platform if you want a personal or non professional blog. In other words tumlr is good if want to use it for fun. It is good for sharing small text posts, images or videos.


Features of tumblr - Tumblr is a very easy to use blogging platform. Just create your tumblr account and you are good to go. You can manage your blog from a complete dashboard with very neat interface. If you are new to tumblr then there is no need to afraid because there are various number of free guides are available for blogging with tumblr. Remember one thing, Tumblr cannot be used for business websites or blogs.

Conclusion
From the above discussed three blogging platforms Wordpress is best blogging platform. If you want to create a professional blog or large content management system for your online business then choose self hosted wordpress. Majority of the top 100 blogs on the internet uses wordpress as their blogging platform.

Blogger is the second best blogging platform and is good for personal or small online business blogs. If you want to start a new blog by investing very small amount of money then a blogger blog with a custom domain name is the best choice for you.

And last but not least tumlr is the third best blogging platform which is best suitable for personal use only. but remember one thing, it is not good for professional blogging.

How to add privacy to a blogger blog

How to add privacy to a blogger blog


Private blog is the most amazing feature of blogger. By using this feature one can convert his/her normal blog into a secure private blog. These private blogs are not accessible to normal web traffic. Only specific readers of the blog are allowed to access blog’s content. This option is used when anyone wants to keep his content private from normal web traffic. If you want to share your posts with only specific readers then you can use this private blog feature. Adding privacy to blogger blogs is very easy. It can be done in few minutes. Just follow this easy guide for turning your normal blog into a private blog.


Adding privacy to blogger blogs
Step 1: Login to your blogger dashboard.
Step 2: Select your blog which you want to make private.
Step 3: Select Settings option.
Step 4: Under Basic option go to Blog Readers option and Click on Edit option.
Step 5: Select Private – Only these readers option.
Step 6: Now click on Add Readers option.
Step 7: A dropdown text box will appear.
Step 8: Enter email addresses of the readers of your blog in that text box.
Step 9: Click on Save Changes option.


Step 10: This will send automated invitation to these readers.
Step 11: Now these readers can click on Accept invitation option in the email ad become readers of your blog.

visitor

 
- See more at: http://adminwidget.blogspot.in/2014/06/how-to-add-next-previous-numbered.html#.U60N95SSyKQ