


Add
Tag Cloud to Blogger
This post is related
to adding tag cloud to blogger using labels.
Below is the step by
step guide to cloud tag blogger using
1. Login into your
Blogger.com account.
2. Click Layout
option
3. Now Under “Page Elements” look for “Add a Gadget” link.
4. Click “Add a Gadget” link
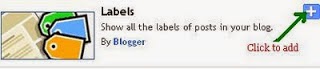
5. Look for "Labels" option
6. Click “labels”
To select
Alphabetically (Click this-Recommended)
By Frequency
Show number of posts
per label (Uncheck This option- Recommended)

8. Click
Save button to see labels as your cloud tag in blogger blog (This option will
show all labels as blogger cloud)
If you wish
to show selected levels in cloud in your Blogspot/blogger blog, then
Go to Step
7
Once you
have completed Step 7
Then Look
for “Selected Labels” which is under “show” section
Click
“Selected Labels” then you will find “Edit” Option, click "Edit"
Here you
can choose labels which you want to show in cloud(see Image)
Example-Check
section, Tags to see how cloud is created in this blog
Useful tips while
using other Widget to Cloud tag in Blogger
*Use the Widget
provided by third party only if you have coding knowledge (This will help you
in judging, the errors)
*Always Save the
Original Template of Blogger before adding Cloud tag codes in Blogger
* Seek professional
help, if you get error while implementing
We have tested
various other Widget to add tag cloud to blogger, however came across errors.
When we make successful test of any other user friendly code for Cloud tag in
Blogger then we will update the post.


0 comments:
Post a Comment